How to install and set up Veeam Agent for Linux
This guide explains how to install and configure Veeam Agent for Linux to automate the backup process on CentOS and Ubuntu systems.
Installation
This guide will show the installation process on CentOS and Ubuntu.
STEP 1. Go to Veeam Linux Backup Download and Sign in.
STEP 2. Choose your operating system and architecture, then click “Get Link”.
STEP 3. Next to “Repository package for CentOS/RHEL/Oracle Linux 7 (Or Debian/Ubuntu)” click the “Download” button.
STEP 4. Copy this file to the remote server you want to backup.
STEP 5. Connect to your remote server.
CentOS Installation
STEP 1. Navigate to the directory with the “.rpm” file.
STEP 2. Execute the following command:
```
rpm -ivh ./veeam-release* && yum check-update
```
STEP 3. Install Veeam with the command:
```
yum install kmod-veeamsnap veeam
```
STEP 4. Then, install nfs-utils:
```
yum install nfs-utils
```
Ubuntu/Debian Installation
STEP 1. Navigate to the directory with the “.deb” file.
STEP 2. Execute the following command:
```
dpkg -i ./veeam-release* && apt-get update
```
STEP 3. Install Veeam with:
```
apt-get install veeam
```
STEP 4. Then, install nfs-utils:
```
apt-get install nfs-common
```
Installation on Backup Server
On the backup server, you will need to install and configure NFS.
STEP 1. Install the NFS module
CentOS:
```
yum install nfs-utils
```
Ubuntu/Debian:
```
apt-get install nfs-common
```
STEP 2. Create a Backup folder:
```
mkdir /var/backupFolder
```
STEP 3. Set the required permissions:
```
chmod -R 755 /var/nfs_share_dir
```
STEP 4. Start NFS services:
```
systemctl enable rpcbind
systemctl enable nfs-server
systemctl enable nfs-lock
systemctl enable nfs-idmap
systemctl start rpcbind
systemctl start nfs-server
systemctl start nfs-lock
systemctl start nfs-idmap
```
STEP 5. Edit the /etc/exports file:
```
/var/nfs_share_dir x.x.x.x(rw,sync,no_root_squash)
```
**NOTE:** Replace “**x.x.x.x**” with the IP of the server you want to backup.
STEP 6. Restart the NFS server:
```
systemctl restart nfs-server
```
STEP 7. For CentOS 7, execute:
```
firewall-cmd --permanent --zone=public --add-service=nfs
firewall-cmd --permanent --zone=public --add-service=mountd
firewall-cmd --permanent --zone=public --add-service=rpc-bind
firewall-cmd --reload
```
Setting Up Veeam
STEP 1. On the server you want to backup, run:
```
veeam
```
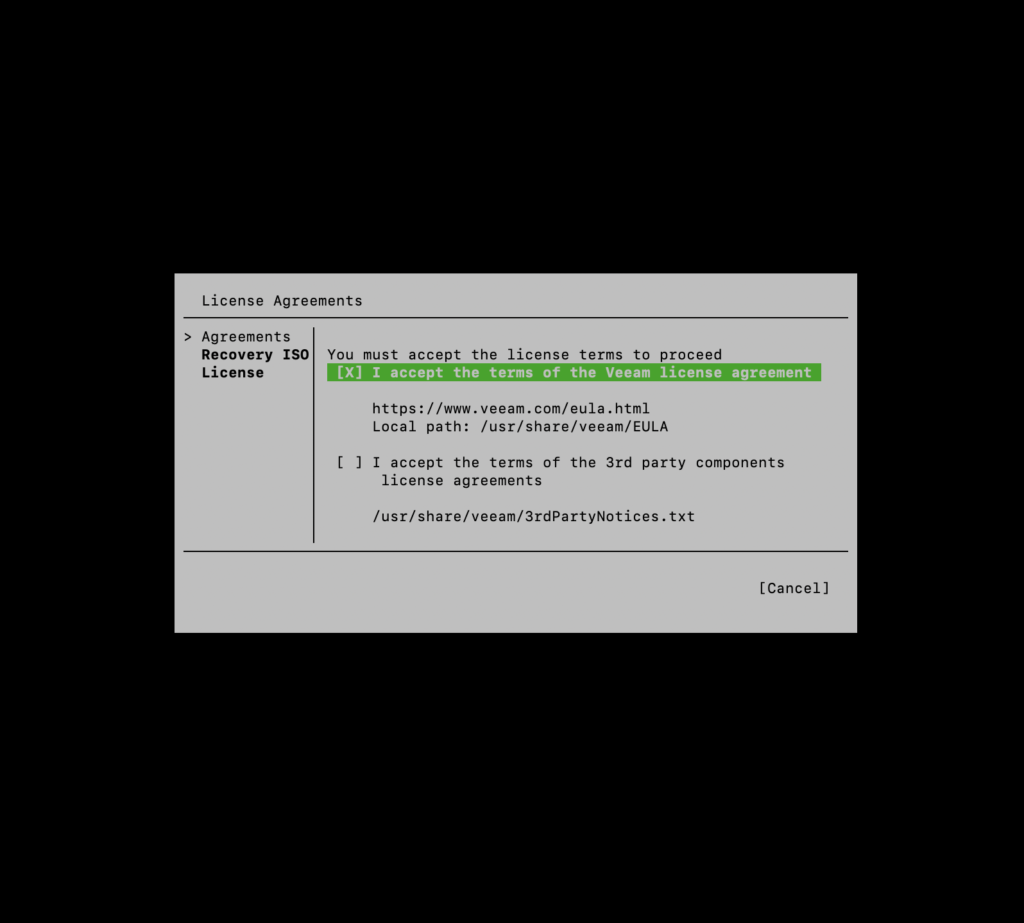
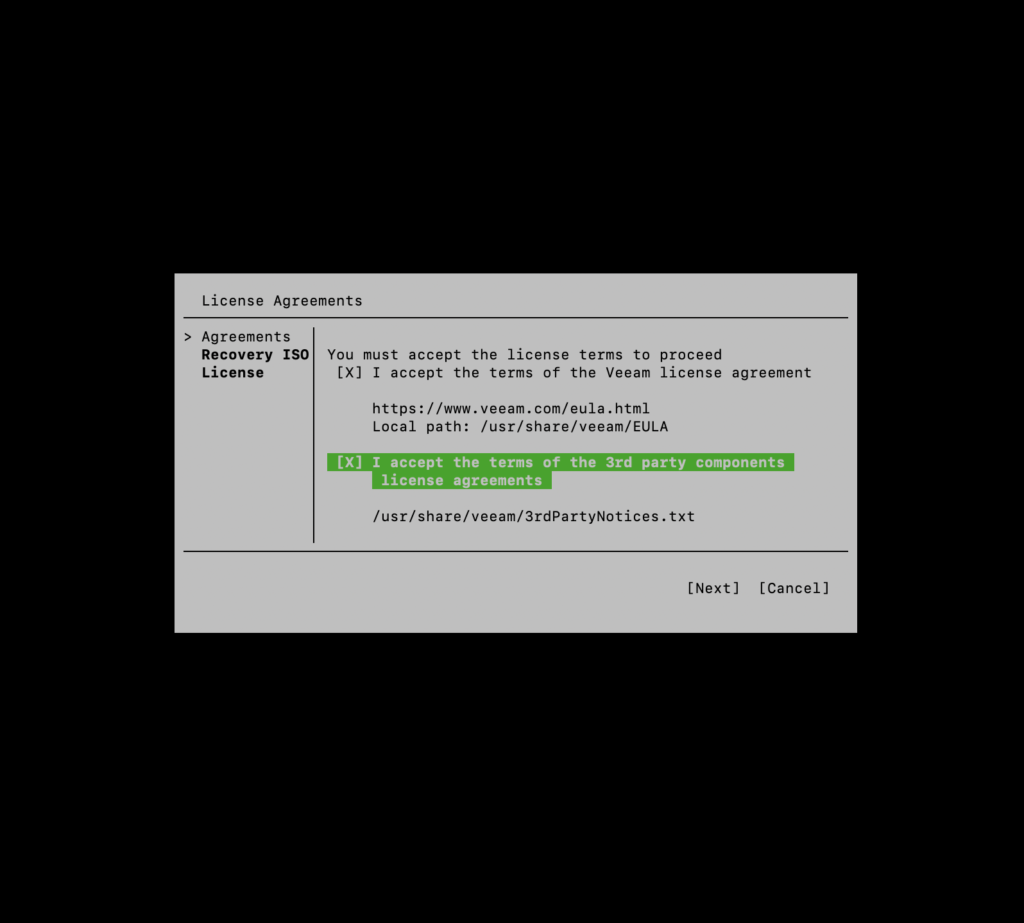
STEP 2. Accept the license terms by pressing “Space” and then ”↓” followed by “Space” again. Finally, press “Enter”.
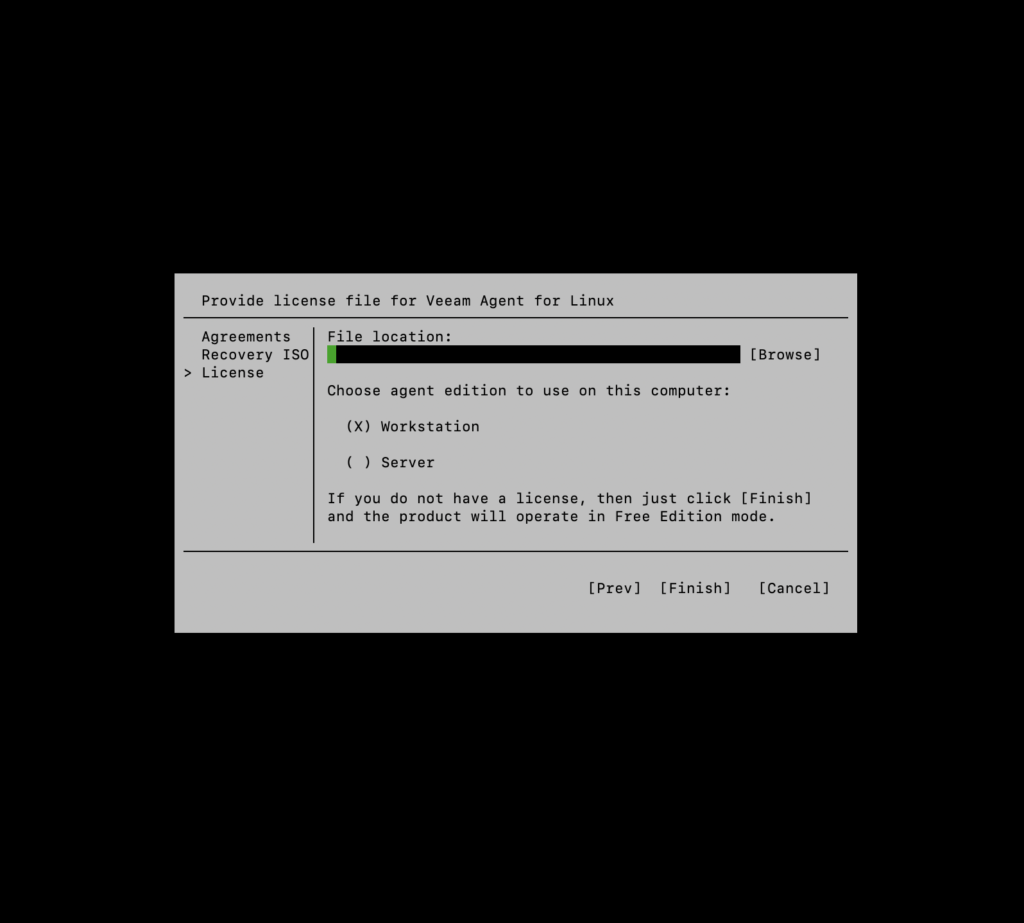
STEP 3. Confirm if “Workstation” is selected and press “Enter”. If not, press “Tab” to select it.
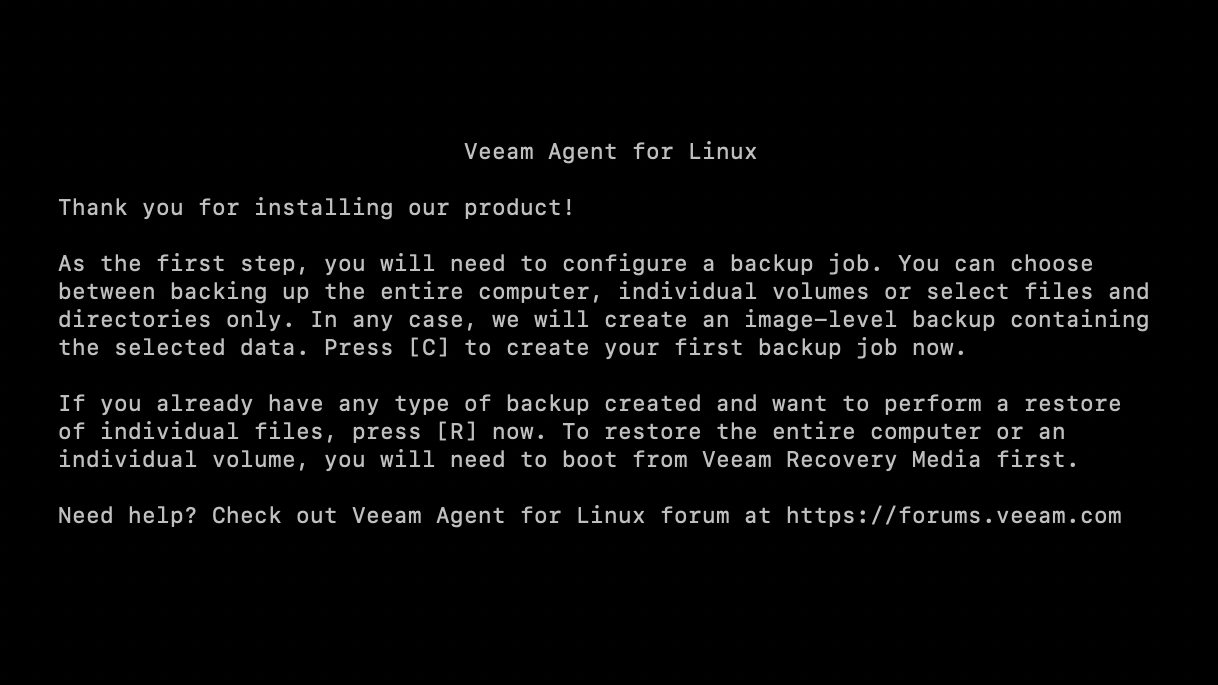
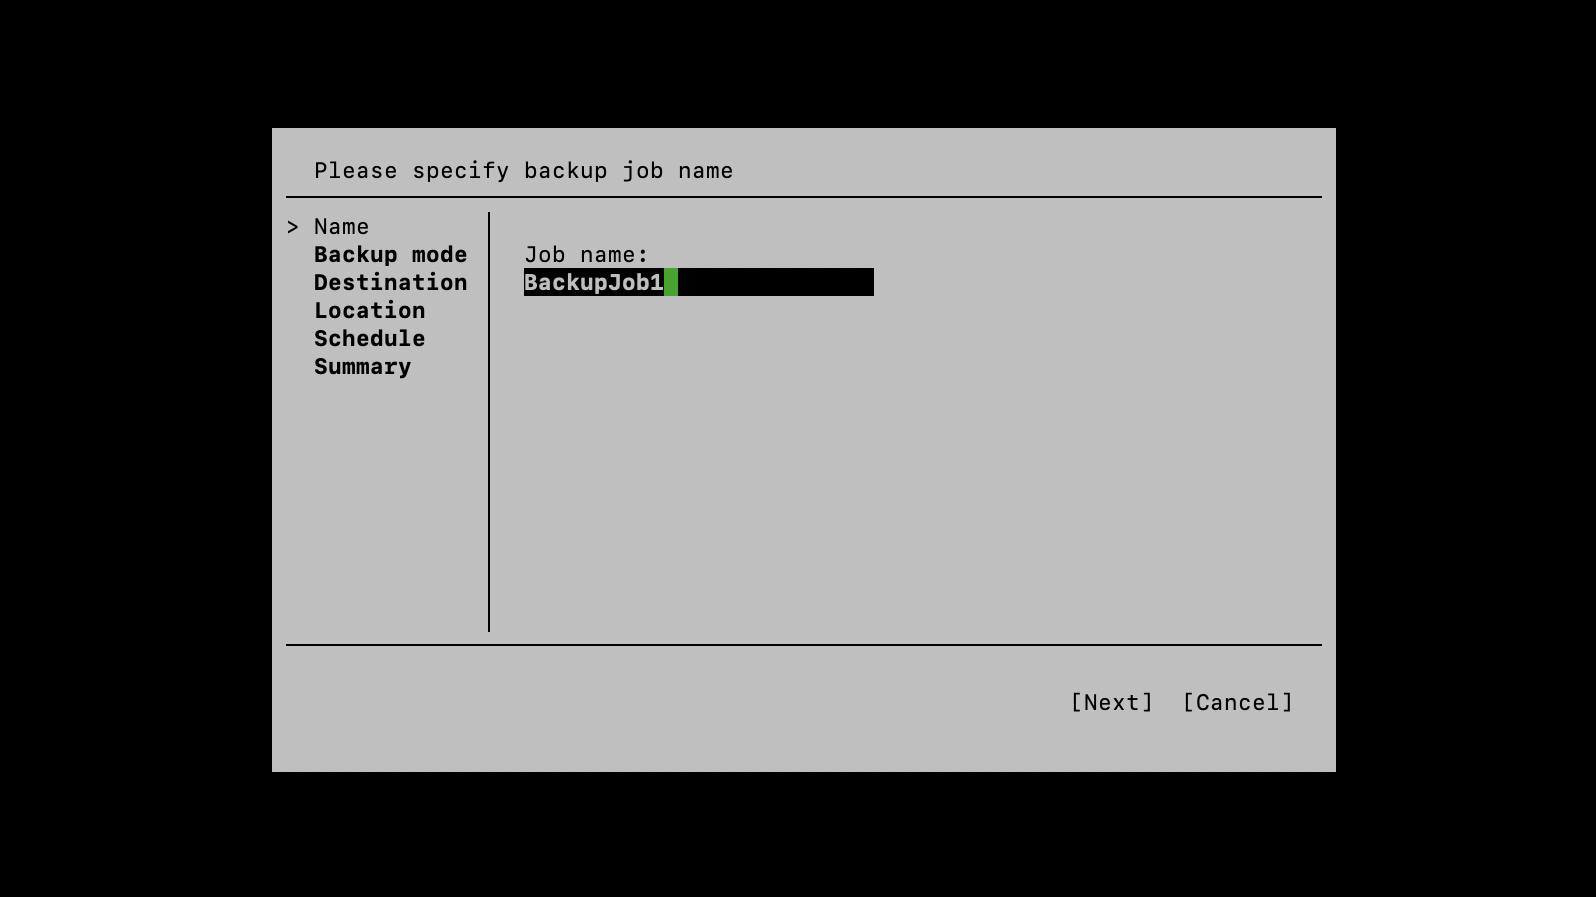
STEP 4. Press “C”, type a backup job name, and press “Enter”.
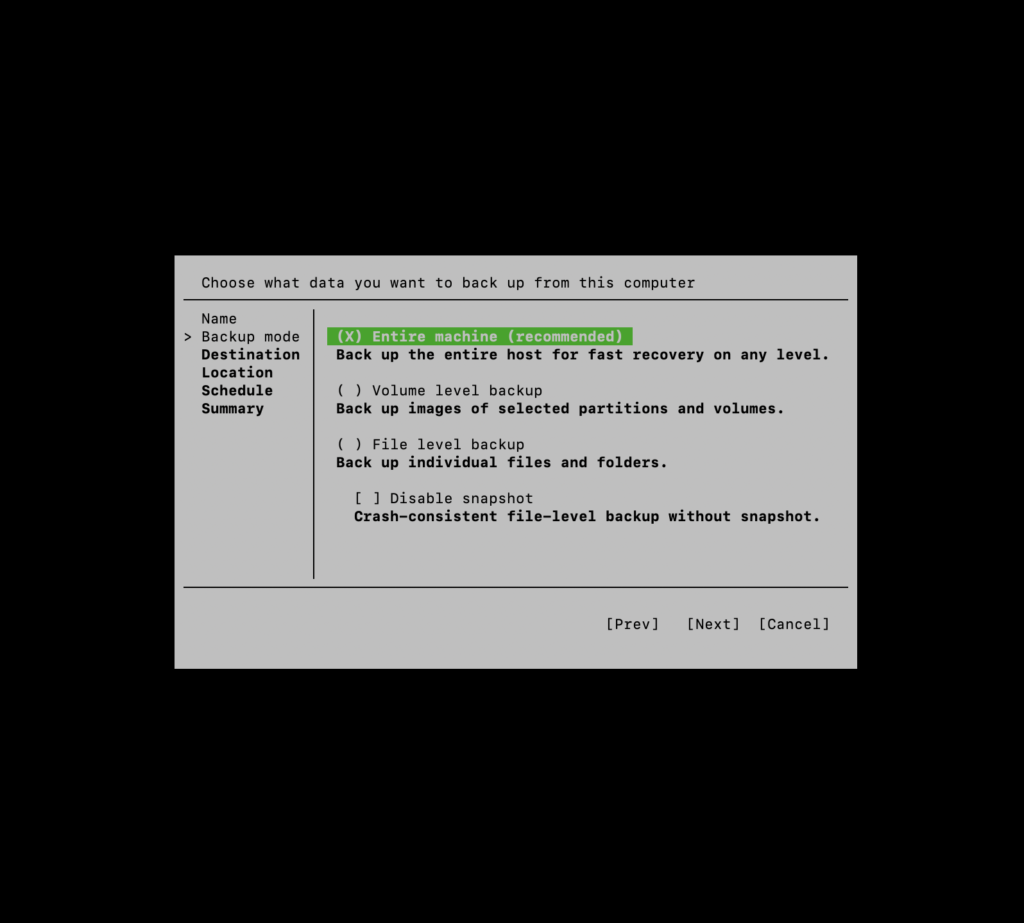
STEP 5. Choose the backup mode. It’s recommended to backup the entire machine, press “Enter” to continue.
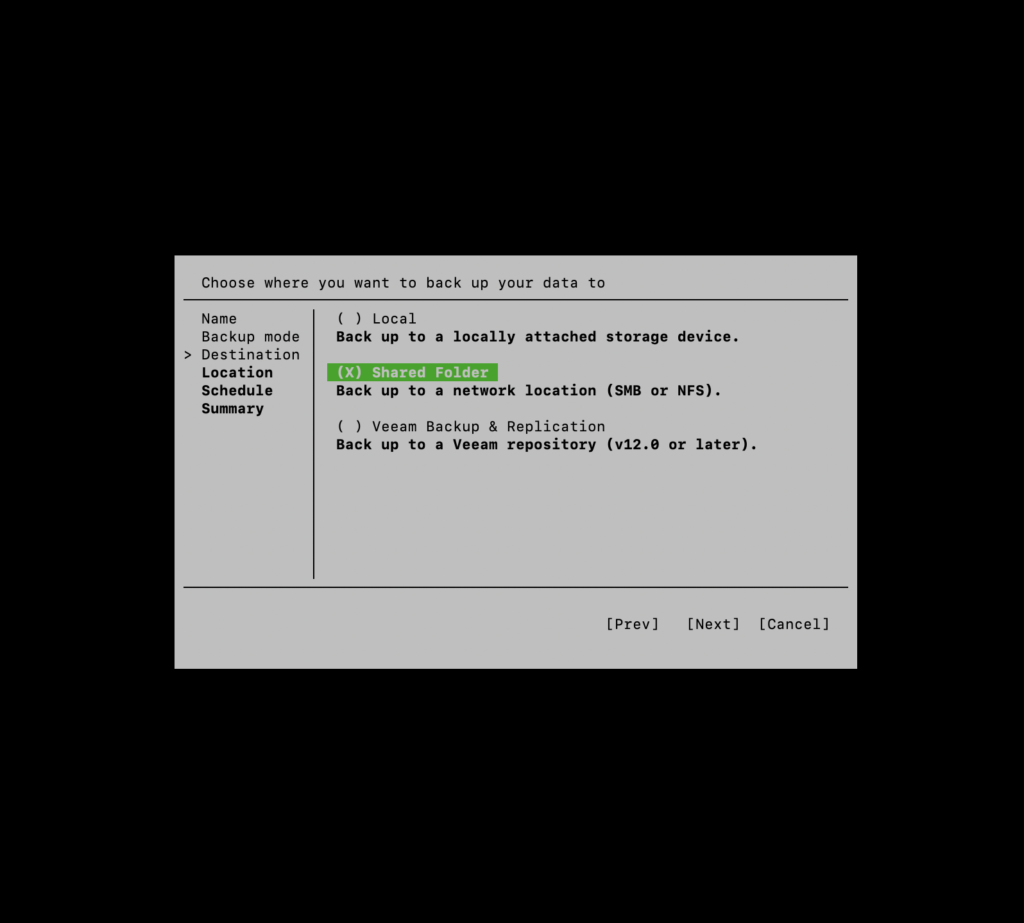
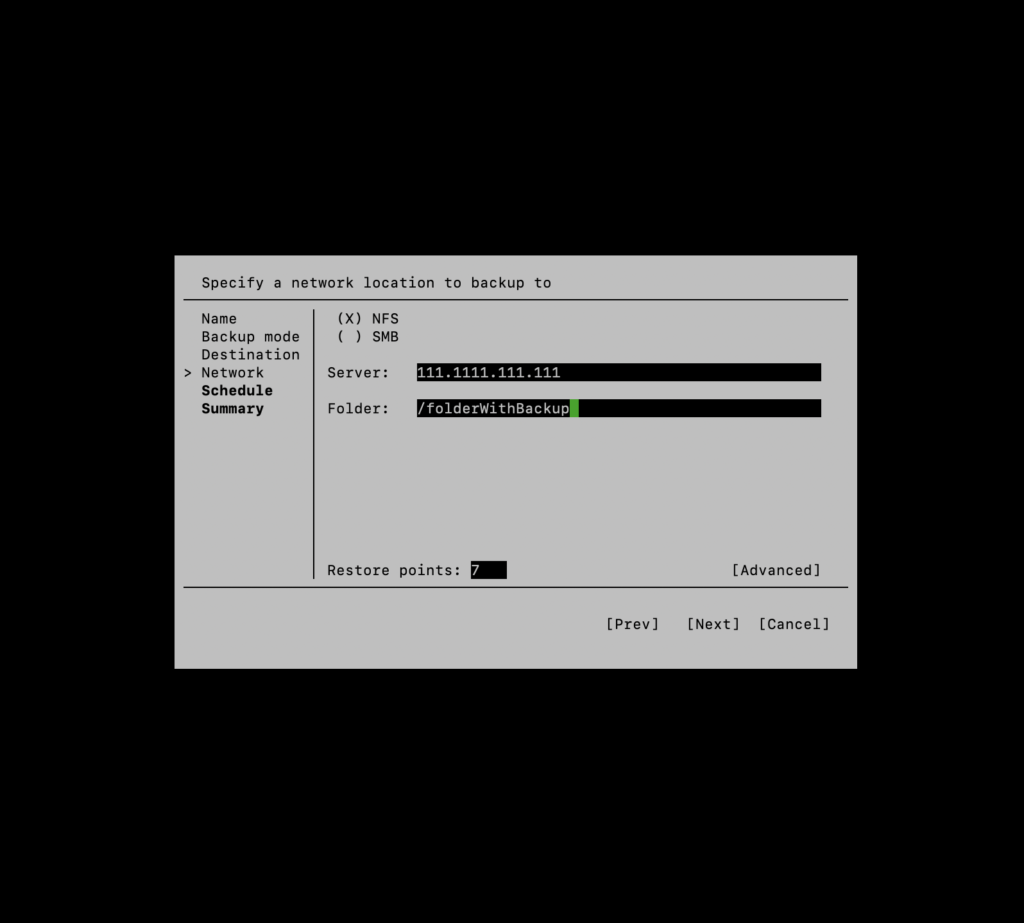
STEP 6. Select shared folder as your destination.
STEP 7. Choose NFS and press “Tab”.
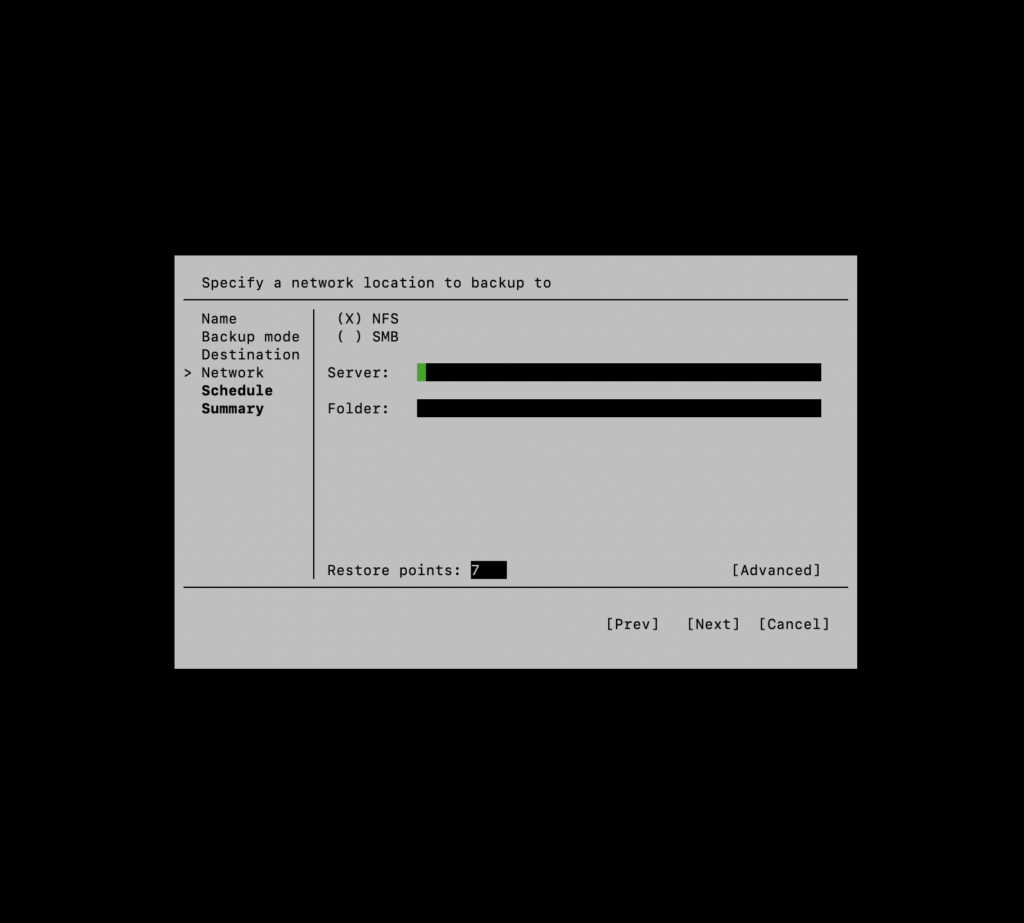
STEP 8. Enter the IP address of the backup server and the destination folder. Press “Enter” and wait.
STEP 9. Ensure “Run the job automatically” is activated; if not, activate it with “Space”.
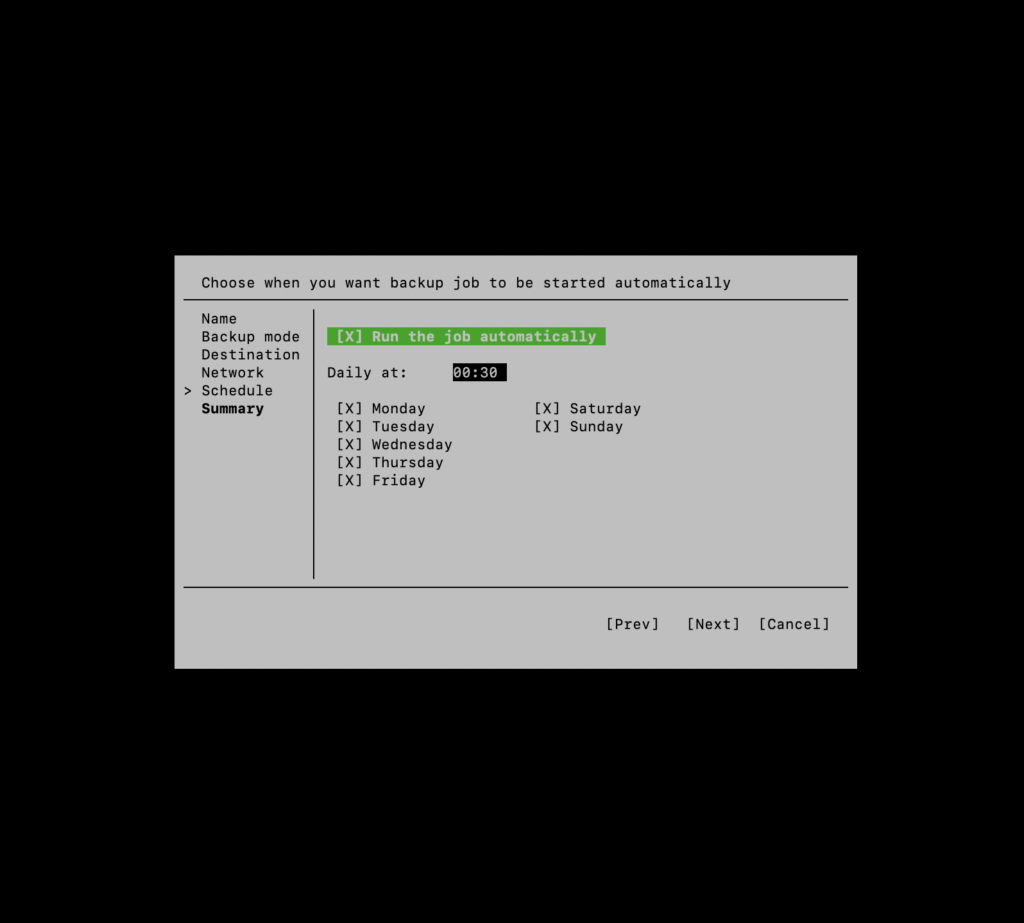
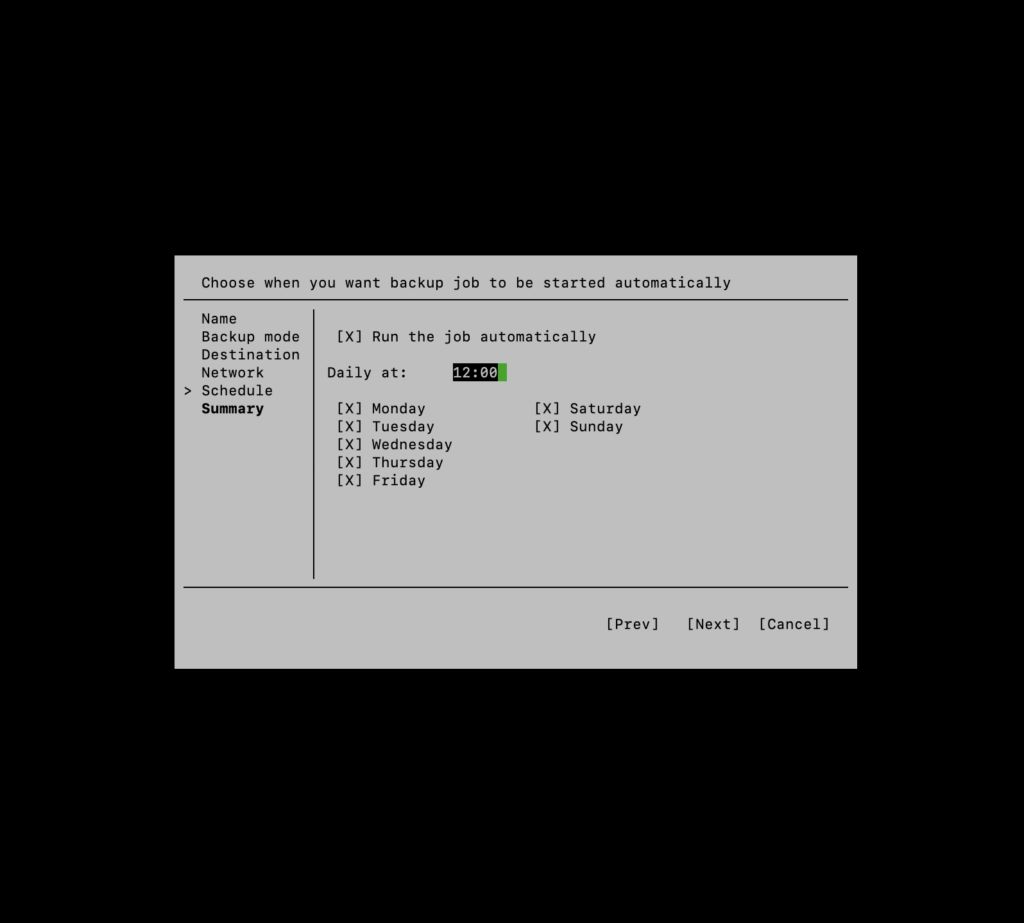
STEP 10. Press “Tab” to set the backup start time using the arrows to adjust hours and minutes.
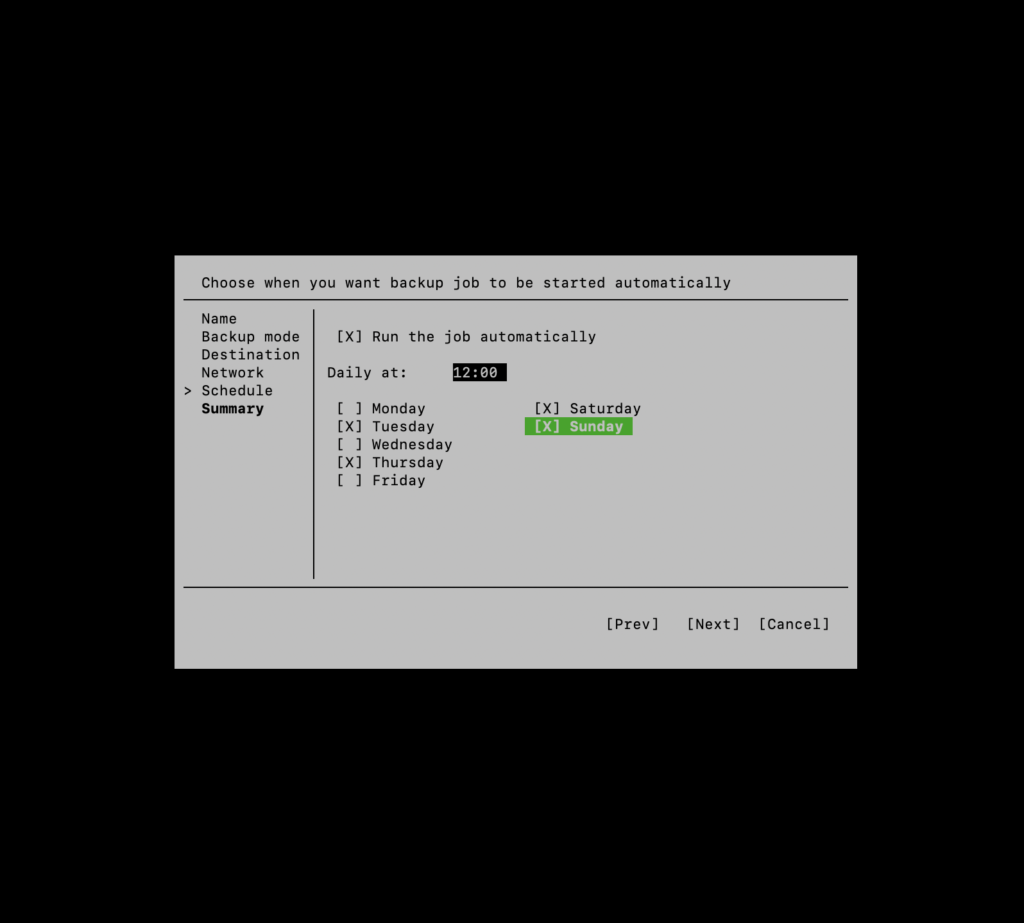
STEP 11. Use “Tab” to select days and navigate using Up and Down arrows to choose the days.
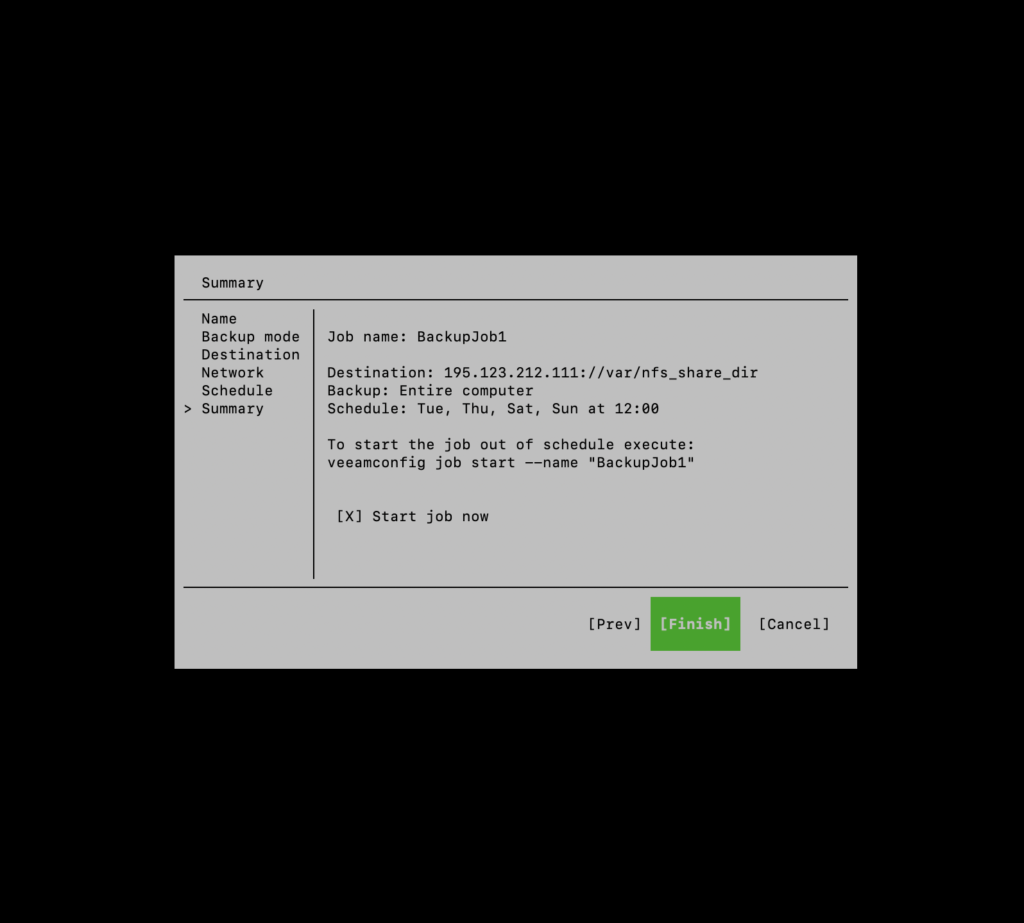
STEP 12. Hit “Enter”. To start the backup now, select “Start the job”; otherwise, it will start as scheduled.
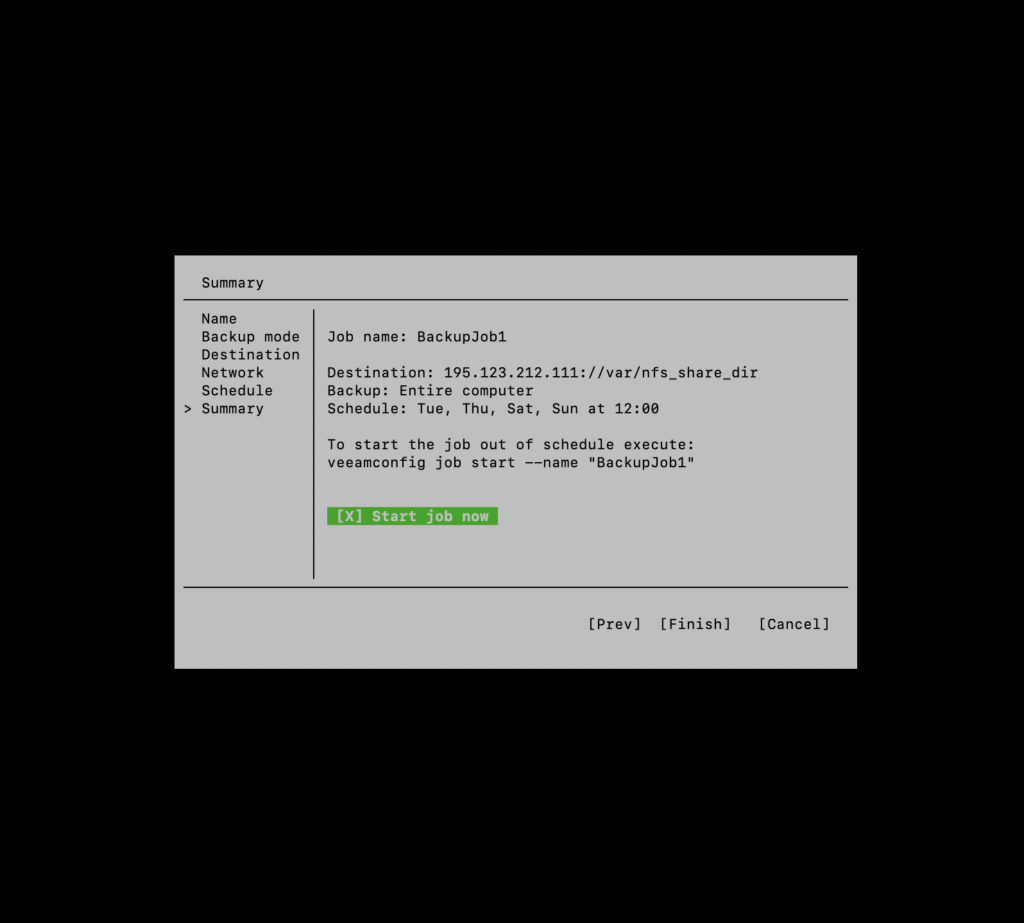
STEP 13. Press “Enter” to finish.
Related Articles
Browse more articles in these categories.